
A “HOW TO GUIDE” for changing handlebars and risers or upgrading front brake lines.
in progress for updates check out our facebook album. https://www.facebook.com/media/set/?vanity=MattBlackCustomDesigns&set=a.3672493856175797
INSTALLATION OF THROTTLE CABLES
The bars and throttle cable were removed from the throttle body in a previous post. So now its time to move on to the installations… new throttle cables are a must when fitting taller bars.. Yamaha make a set specifically for these 6″ taller risers. However whichever extension you choose installation is the same.. first you must remove the stock cables. remove the 2 screws holding the throttle housing in place. Note also the screw at the back of the housing

phillips head screwdriver to remove the clamp.

with the clamp removed the cables are free but you cant take them out just yet
open out the housing carefully and take a good look at how the cam sits in the housing. Take reference photos. In particular note how the throttle moves correctly and how it snaps back when you let go of full throttle.
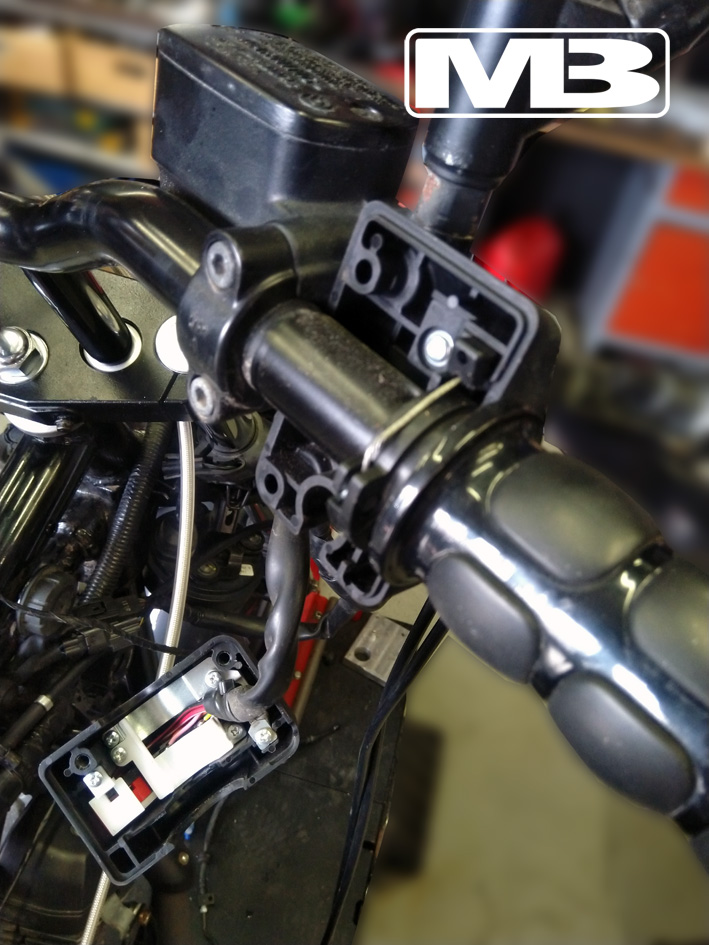
once you are happy that you understand how the cam works you can remove the cables.

pull the assembly from the bars as shown.
this is how the throttle cable ends are connected to the cam. note position of stock cam.
you can ease out the cable ends and release the cam and grip

place the new cable ends in . you can now replace the assembly back on the bars and replace the housing you removed in previous steps

if at this point you are ready to finish the bike or are only changing the throttle cable. make sure all cables are neatly controlled.
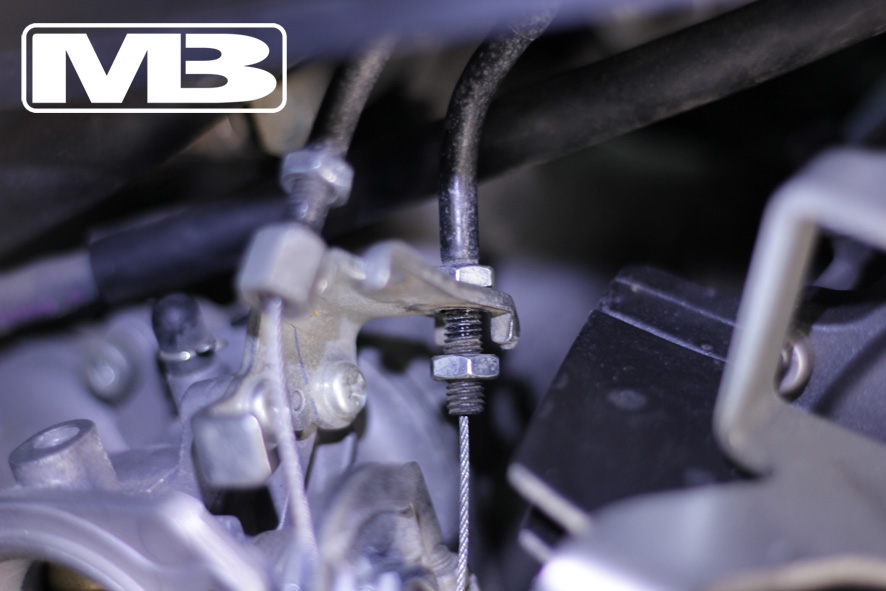
At the throttle body end we also need to install the cable ends in the correct position. Here you can see the end and the cam i need to engage. This is the return cable which pulls the throttle closed.

place cable end in the hole.

engage the cable end and cable in the groove of the cam.

slot the threaded tube into the holder and tighten enough so it does not fall back out

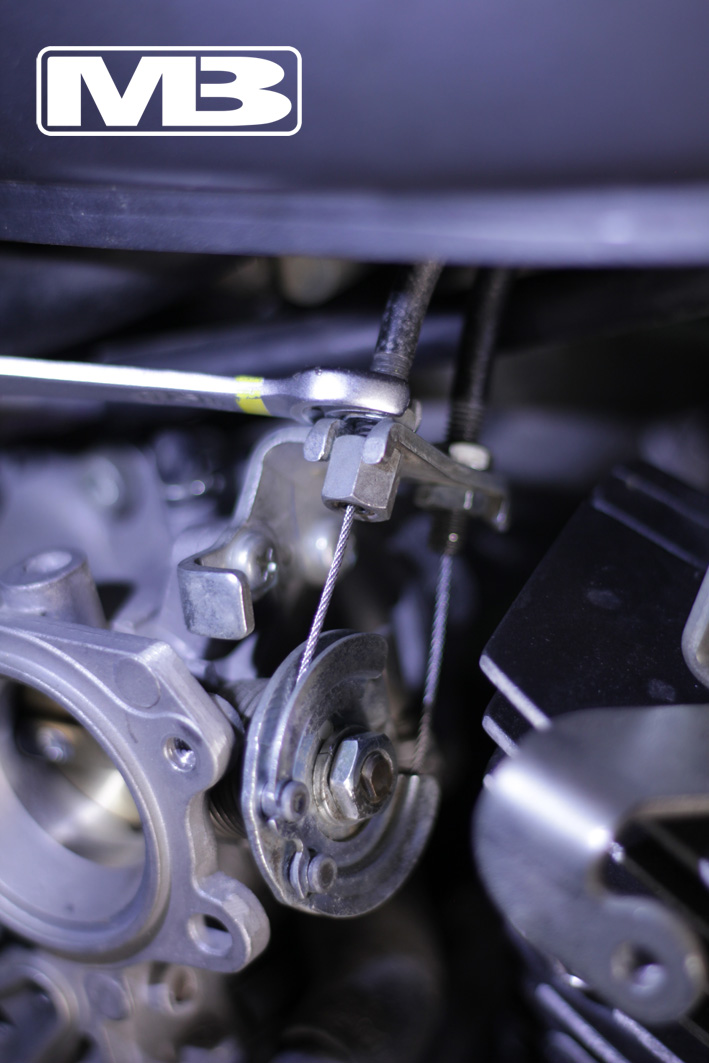
repeat the procedure for the pull cable
engage the threaded tube into the holder
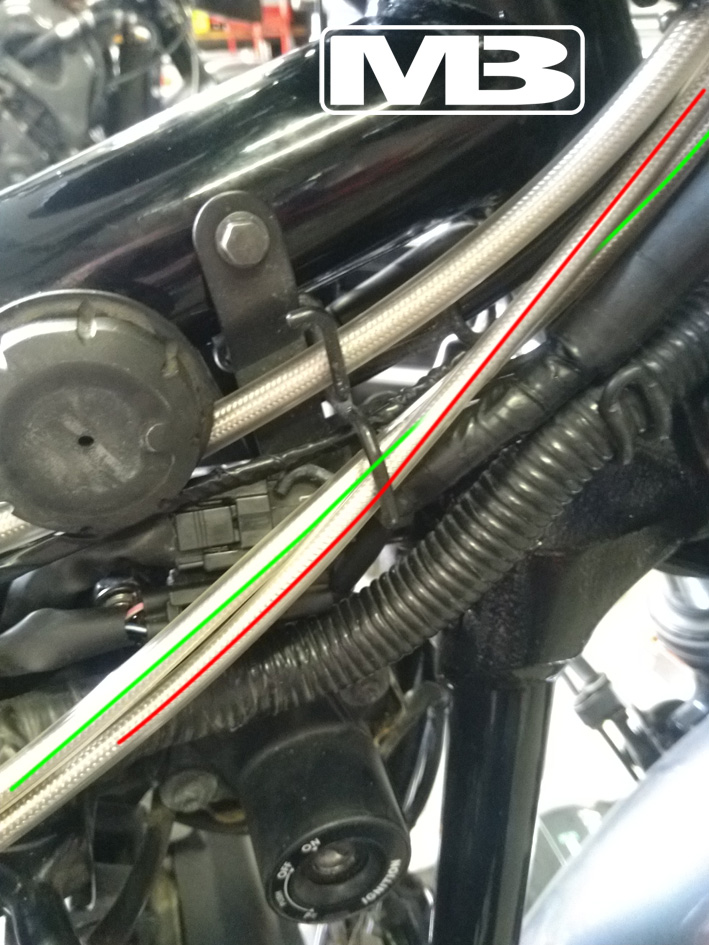
the green guide here shows an adjustment that tightens the cable (because the end of the cable housing becomes closer to the throttle cam) . ideally you need a little play so the cam will fully close when the trottle is at idle. so adjust until the grip will just move a few millimetres before the cam starts to move.
in contast the green guide below shows a slack adjustment which means you will have to rotate the throttle grip a lot before the cam begins to work. what you need is the right balance between the two. keep adjusting until the result matches steps the grip motion. shown next

below, the green guide shows the static throttle position. the red line shows the point at which the cam at the throttle body starts to move.

when released from full throttle the grip should snap back closed without any hesitation or sticking.

when you are happy with the behaviour of the throttle you should tighten both the lock nuts.
see part 1 (tank removal) here https://mbcustoms.eu/2021/02/02/handlebar-extension/
see part 2 (handlebar removal) here
https://mbcustoms.eu/2021/02/11/handlebar-extension-pt2-handlebar-removal/
see part 3 (measuring and ordering brake lines) here
https://mbcustoms.eu/2021/02/19/handlebar-extension-pt3-measuring-and-ordering-brake-lines/
see part 4 (re route wiring) here
https://mbcustoms.eu/2021/02/17/handlebar-extension-pt3-re-route-wiring/
see part 5 (changing steering bearings) here
https://mbcustoms.eu/2021/03/10/handlebar-extension-pt5-changing-steering-bearings/
see part 6 (MB bushing kit) here
and follow us on https://www.facebook.com/MattBlackCustomDesigns
